The Family Camera
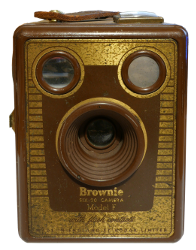 My first experience with cameras was in 1968 with a Box Brownie 620 roll film camera on a school
trip to Twycross Zoo when I was at primary school.
Like all kids, I played around with the buttons, knobs and levers on it on the bus on the way there and managed to set it to 'Bulb'
which meant that as long as I had my finger on the shutter release button, the shutter would stay open. Fortunately, film cameras
used negative film that had a lot of latitude in the exposure and whilst many of them were a bit blurry, they weren't all burned out.
Following that, my mum got a Kodak instamatic camera which took a Kodak CX 126-20 film cassette. A few years after that we got a
camera that took 110 film cassettes but I can remember that I was never impressed by the quality.
My Own First Cameras
Go forward to 1981. I had just been made redundant and I had some money. In Derby, on the Spot, there was a photography shop and
it was from there that I bought a Mamiya ZE2. It had a metal body and metal focal plane shutter so you could use it with infrared
film and it would not fog the film - plastic bodies and cloth shutters would let infrared light through. With this camera, with its
50mm Mamiya-Sekor lens and a 70-180mm zoom lens that I bought, I tried out virtually every type of film including
Extachrome IR colour slide (E4) film and black and white IR negative film.
Apart from the usual colour photography using colour negative and slide films (from 64ASA to 400ASA), I also tried out:
- Infra red - the E4 colour slide film needed a yellow filter to block out the blue light so that the light could transpose by
one colour ie IR->Red, Red->Green, Green->Blue. In this way, plant foliage which reflected plenty of IR looked magenta
- the film had originally been developed so that camouflaged gun emplacements which looked green to the naked eye would not
reflect IR and so, on the IR film, they would look blue and stand out a lot. After WW2, they managed to find a civilian use
for it insofar as if you took an aerial photograph of an orchard, the amount of IR relative to green light reflected would
be dependent upon the healthiness of the trees and so any plant that was feeling a bit under the weather could stand out as
displaying a different hue and with an orchard having trees planted in an orthogonal way, it would be easy to identify the
individual and take the appropriate action.
- Lightening - this is difficult to film because the event has such a short duration. I found that stopping down a lot to
get a nice, long shutter duration and then listening to the radio tuned off-station, there would be a number of crackles as
the charge in the clouds would concentrate just before it struck to ground. With a bit of practice, listening to the crackles
and observing when and where a cloud-to-ground (CG) strike would occur, I could occasionally record one. This turned out to
be more successful than I had anticipated with an experimental roll of 36 exposures dedicated to the project, I recall
getting two or three CGs on film.
- Long exposures. Night time was good for this and with a number of roads intersecting at Derby, there were plenty of bridges
with which to record passing cars and so on.
- Flash triggered by sound - I used to get Practical Electronics magazine and Practical Wireless magazine and in one of them
was a design for a circuit that would take the output from a microphone and trigger a flash unit. You could introduce a delay
in the order of tens/hundreds of milliseconds. With this, I photographed the after effects of a drop of water hitting water
in a saucer and producing the column of water we are all familiar with. The room had to be darkened and then the shutter opened.
Next the drop would fall and when it hit the water, the delay would start timing out and then the flash would go off and I would
close the shutter again. The ZE2's bulb setting was used for this.
I also bought the Mamiya power drive/winder for the ZE2 and it could take around 1.8fps. I used this to good effect when they knocked
down the chimneys at Spondon power station, following the stack as it fell to the ground.
In addition, I also had access to the British Celanese Photgraphy Club dark room and had a lot of fun experimenting with developing negatives and
printing them. One thing I remember trying was the Sebatier effect (pseudo-solarisation) which worked rather nicely. Additionally,
we would use toners for colouring black and white prints to sepia.
The brother of a member of a band that I was in at the time was also into photography and he introduced me to the Jessops catalogue
which at that time was a large sheet of paper (about A1 as I recall) printed on both side with very small writing (the characters were
around 2mm high). I decided what camera I wanted and went to Leicester. I came back with a Mamiya RB67 Pro S extended medium format camera
(54x68mm negative on 120/220 roll film) with a standard 90mm Mamiya-Sekor lens and 120 back; a Polaroid Land Pack back; Bellows lens hood; two waist finders
grilles; and a Gossen Lunasix III light meter with the tele-attachment. The Lunasix was so good that at low light levels that if you could
read the dial (it wasn't LED or backlit LCD or anything like that, this was paint) it would give you a reading.
These, I had for years until I eventually sold them due to financial considerations - I made a point of keeping the tripod though, a
decision that I have never regretted.
In the mid- 1990's and early 2000's, I did a lot of computer modeling with the wonderfully cross-curricular and wide-age-ranging
subject of water rocketry. I used to use Kodak disposable 35mm cameras for taking photographs which would go off to be developed
and then I would scan the images I wanted in to the computer so that I could use them on the water rockets website
here
for example. I even launched one of these on a water rocket
here.
Into Digital Cameras
In early 2002, I got hold of a Digital Dream's "l'esprit" camera which could take 80 shots in QCIF
(176 x 144) which at 12fps is around 6.5s of film. On 27th May 2002, I was the first person to launch a self-contained video
camera on a water rocket - you can see that crude video on YouTube
here with the second video taken by the rocket
here and there is more about it
here.
Many have followed in my footsteps and cameras have improved along with everything else relating to this, in fact, the quality and duration has
improved no end. However, I was the first.
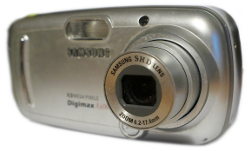 In the early noughties, I started a second journalism job, writing for PC Plus magazine and for some of that work, I did need
to be able to take some of my own photographs so I used a Samsung Digimax A400 camera which took 4Mp images which could also record just
sound files as well and it worked beautifully if I needed to interview somebody.
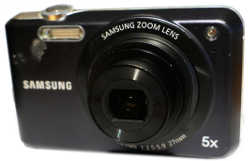 Then, one day, it just stopped working and I needed a replacement so I got a Samsung ES80 which worked nicely and still does.
This camera is deliciously thin although the large glass back makes it susceptible to damage - like if you sit on it, for instance - so
it has a hard case. I managed to find a replacement screen for it and it was very tricky to replace but I managed it and it works fine.
Then, my daughter moved out and gave me her Nikon D3100 which is a nice camera but it is a bit on the bulky side for just taking around
with you - it is more like the sort of thing that you would use if you were going to take on a trip where taking photographs was the
primary focus (if you will forgive the pun).
Onto Leica
I needed something that was physically smaller that I could carry but that would also take photographs that were of good quality and
size. Ideally, I should also have a lot of control such as shutter speed, aperture and so on. My Mamiya ZE2 that in effect, I
learned photography on had a nice layout and good quality, sharp lenses (Mamiya Sekor) as did the RB67 Pro S. Then, I
remembered a make of camera that my friend from the early 1980's was always talking about, it was in the Jessops catalogue and
expensive but the pictures were very high quality and he always wanted one. That manufacturer was Leica. Ideally, I wanted one with
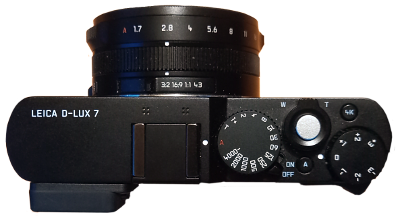 the top layout similar to the ZE2. Interchangeable lenses would be great but a fixed zoom with a good range on it would do instead as
long as it was good enough.
One of the problems with digital cameras is that they have different sensor sizes with (something that I found curious to start with)
miniature format's 24x36mm negative considered 'full' sized. In reality, there is nothing special about 24x36mm other than the fact that
it was the original negative size of miniature film cameras. It is just a number. If you break away from the emperor's new clothes of 24x36mm
and think about it, the only things that matter are the laws of physics. A sensor needs to have enough pixels to be able to do its job and
it needs to be sufficiently large so that the little wells that the light goes into for each pixel are large enough so that you don't get
diffraction effects creeping in that would mess up the image. It doesn't matter whether it is 10mm across or 100mm.
It seems that as far as pixels go, a lower end is somewhere around 10Mp (depending on whether you need to use the results for holiday
snaps or getting published in magazines) and as far as an upper end goes, something along the lines of 50Mp - much more than that and
you are getting more than your eyes see although it is worth noting that with a lot of pixels, you can crop an image a lot and still retain
a sizeable image.
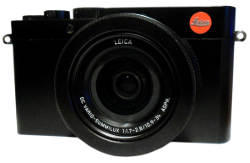 With all of this in mind, I went for the Leica D-Lux 7 and after a while, I found somewhere that was willing to sell it to me for the
price I was willing to pay. Even though it has a fixed lens, it has a decent optical zoom (just over 3x) and a large sensor that it
crops differently for whatever aspect ratio you need to produce thus utilising more effectively the image area that the lens produces.
In this way, it can keep the lens physically smaller - remember that for a given lens design, the diameter and the length grows
proportionally to the size of the image produced and the weight goes up by the cube. The sensor on the D-Lux 7 is smaller than 24x36mm
and curiously the size of the sensor is reported as 4/3" which means that the diagonal of the image on the sensor is 3/4"
(just over 19mm). The diagonal on a 24x36mm image is around 43.3mm so the size of the 4/3 sensor is roughly half that of the 24x36mm
image. This means that the 24-75mm f1.7 aspherical lens on the D-Lux 7 weighs only around one eighth of what the same lens would
be if it were for a 'full', 24x36mm lens.
The Leica D-Lux 7:
- has a very high build quality and its style and design work excellently. It is one of those cameras that just wants you to take it
everywhere and just go out and take more photographs;
- has a lens that is very contrasty - remember that you cannot have high contrast and high definition in the same lens because the laws
of physics will not allow it - high contrast seems to be quite attractive to a lot of people and the camera produces images that do look
very good;
- It can have multiple aspect ratios - 3:2, 16:9, 1:1, 4:3 so if you need to shoot to a particular aspect ratio, you can fill the frame
appropriately, knowing that you don't need to crop it later and therefore you are going to get the most out of the sensor;
- 4k video at 30fps along with a number of other specs including FHD (1080p) at 60fps. It is worth noting that you can pull out and save
as a separate 4k image any frame from the video;
- 4k single shots (around 8 megapixels at whatever aspect ratio you like) at 30fps which is quite useful, especially as it has a mode where
if you press the shutter release, it will save the previous second as well as the next second so you get 60 frames with your shutter press
half way through. If it is a balloon bursting, a water rocket launching or trying to get that perfect moment of a squirrel eating a peanut,
you will have it all and be able to select the best frames from it.
- it will process RAW in-camera so you can shoot singly or in bursts in RAW only at 11fps (or 7fps or 2fps), select the frames you like
(rate them) and then post-process those alone - deleting the rest (you can get it to delete all of the files except those that have been
rated and/or protected). Note that it will also shoot at those rates if you are saving JPEGs or JPEG+RAW. It also means that you are left
with a number of images that you aren't quite happy with - if you need to correct say, the colour temperature for some reason, you can do;
-
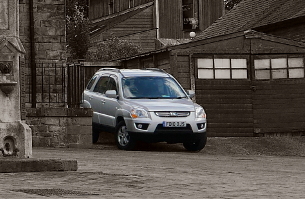 Shooting in RAW means that you can post-process a particular frame in a number of ways so if you want to an image to be monochrome apart
from one item (such as the car in the images above) you can process the RAW to produce two images and import them into your favourite
image processor as layers and then, they are guaranteed to align correctly. Just erase where you want to see the other image and flatten the image.
- The lens will focus down to around about 25mm from the end of the lens, giving excellent macro shots and precluding the need for any
macro device to screw onto the lens.
- The sensor's sensitivity goes from 100ASA to 12,500ASA thus making photographs of stars possible. In addition to this, the lens is
a nice, fast f1.7 and although it has a flash that comes with it, I have only ever used it to make sure it works. With its image stabilisation,
hand held low light photography is more of a reality.
- The IR/UV filter on the sensor is a bit too good to do serious IR photography. Whilst a 760nm IR pass filter will let some light through,
it is so low that the amount of noise that results makes the images very limited in their use.
- There are many more features of this camera. If you get one, I suggest that you spend several weeks with it, familiarising yourself with the
features, working out what you need and what you can leave to one side.