So, without any warranty and trusting that you are able enough to carry out this procedure yourself and safely, here is how to save yourself a small packet on changing the mains cable.
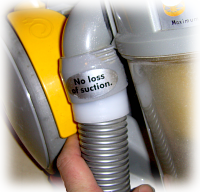 First of all, pull the flexible hose out of its socket as it feeds into the main cyclone First of all, pull the flexible hose out of its socket as it feeds into the main cyclone |
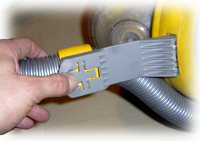 Next, turn it over and on the support bracket, press the little lever - the end furthest from the body of the cleaner - and pull the bracket out. Next, turn it over and on the support bracket, press the little lever - the end furthest from the body of the cleaner - and pull the bracket out.
Put the hose assembly to one side. |
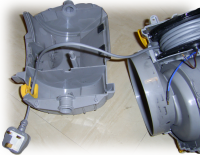
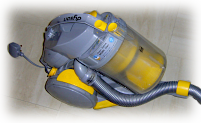
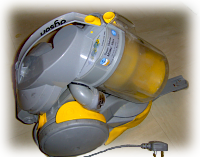 Your DC05 should now look like this. Your DC05 should now look like this.
Next, open the top, remove the cyclone - putting it to one side - and, using a blunt knife (or other flat, but not sharp, object), gently force the hinge open. |
 You can see that the amount you have to bend the hinge is only small and remember - somebody in a factory assembled it just by pushing it together so it must be able to bend that much without breaking. You can see that the amount you have to bend the hinge is only small and remember - somebody in a factory assembled it just by pushing it together so it must be able to bend that much without breaking. |
 Next, you need to take off the wheels - this is because there are screws under there that hold the two parts of the body together. Basically, all you do is put something between the body and the wheel and pull the wheel off. I used my fingers - there is no need to use anything as a lever - apart from being unnecessary, it would also damage the plastic. I have received several emails informing me that on some models, there is a plastic insert in the wheels that needs removing but there was none on mine. If you have the plastic insert, I am advised that it can be removed by drilling a small hole in the plug which makes it more flexible - this also allows for somewhere to insert a screwdriver into the plug to act as a lever should this become necessary. Next, you need to take off the wheels - this is because there are screws under there that hold the two parts of the body together. Basically, all you do is put something between the body and the wheel and pull the wheel off. I used my fingers - there is no need to use anything as a lever - apart from being unnecessary, it would also damage the plastic. I have received several emails informing me that on some models, there is a plastic insert in the wheels that needs removing but there was none on mine. If you have the plastic insert, I am advised that it can be removed by drilling a small hole in the plug which makes it more flexible - this also allows for somewhere to insert a screwdriver into the plug to act as a lever should this become necessary. |
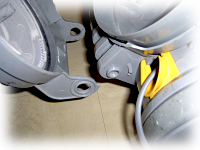
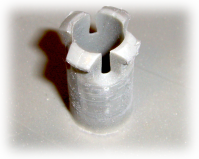 This is the axle in the centre of the wheel. You can see that it conforms to the 'snap together' philosophy that governs much of the Dyson's design and here, there is no problem with that. This is the axle in the centre of the wheel. You can see that it conforms to the 'snap together' philosophy that governs much of the Dyson's design and here, there is no problem with that. |
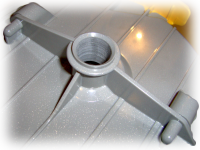 This is the hole that it goes into. On this bracket, you can also see the two screw mounts at either end. This is the hole that it goes into. On this bracket, you can also see the two screw mounts at either end. |
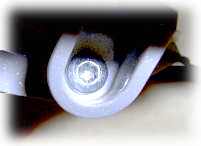 Here, you can see the type of screw you are dealing with. These are those new, six-sided star type of head. You could, at a pinch, use an Allen Key but you will find it difficult because these lie parallel the surface of the bulkhead. Here, you can see the type of screw you are dealing with. These are those new, six-sided star type of head. You could, at a pinch, use an Allen Key but you will find it difficult because these lie parallel the surface of the bulkhead. |
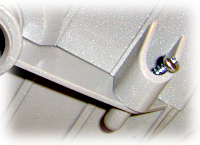 You can see now how they go. There are four of them in all. You can see now how they go. There are four of them in all. |
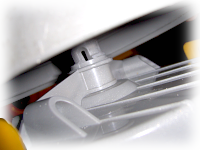
 Next, turn it over and you will see a screw in the middle of the body. Next, turn it over and you will see a screw in the middle of the body.
This one is set deeply in the machine so you might need a proper screwdriver for it rather than one of those interchangable types as the hole it resides in is narrow. |
 Now, turn it on its back and remove the lower half of the casing. Now, turn it on its back and remove the lower half of the casing. |
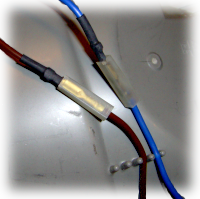 Inside, you will notice a pair of wires - one blue, one brown. These are the mains supply to the motor and switch. Inside, you will notice a pair of wires - one blue, one brown. These are the mains supply to the motor and switch.At this point, just check that your mains lead works - if it is that that is at fault, chop off the plug and around 6 inches (15cm) of cable and check for continuity again. If you have it, you probably just need to repace the plug and you've saved yourself the cost of buying a new cable (if you don't, try chopping off another six inches and trying again). Assuming that trying that didn't work, unplug the connectors. |
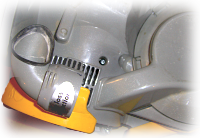
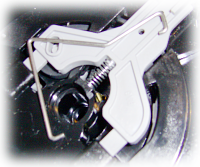
 Now, you can see the winder, its contacts and where the mains lead goes - through the yellow insert on the left. Now, you can see the winder, its contacts and where the mains lead goes - through the yellow insert on the left. |
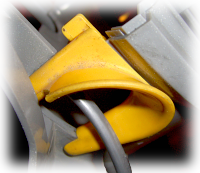 This is the yellow insert in close-up. It is held in place along two of its sides and then half way along a third side. It is flexible enough to bend out of this grip without harming it. Once out, the cable just comes out of it as the insert does not go all of the way around the cable. This is the yellow insert in close-up. It is held in place along two of its sides and then half way along a third side. It is flexible enough to bend out of this grip without harming it. Once out, the cable just comes out of it as the insert does not go all of the way around the cable.
Now that the cable is free, make a mental note of which way around the cable drum goes (pay attention to where the grey lever is) and take the cable drum unit out. |
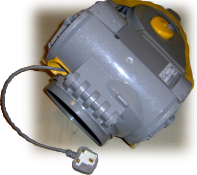
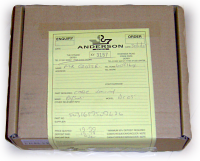 This is the new cable drum. The Dyson (manufacturer's) part number is 90500701 - "Cable Rewind with Silver Flex" for Dyson DC05 (£19.99). This is the new cable drum. The Dyson (manufacturer's) part number is 90500701 - "Cable Rewind with Silver Flex" for Dyson DC05 (£19.99). |
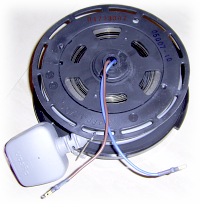 This is what it looks like. Note that it has a metal retaiing clip in place. This holds the cable in transit and needs to be removed before you use it. This is what it looks like. Note that it has a metal retaiing clip in place. This holds the cable in transit and needs to be removed before you use it. |
 To remove it, just unhook it. One end goes over the outside of the rim and the other, goes through a hole in the grey, plastic lever. To remove it, just unhook it. One end goes over the outside of the rim and the other, goes through a hole in the grey, plastic lever. |
 This is what it looks like when it is removed. You can now either put it on the old drum or throw the retaining clip away as it no longer has any use. This is what it looks like when it is removed. You can now either put it on the old drum or throw the retaining clip away as it no longer has any use.
Now, you need to put it all back together again. So, put the new cable drum back in the body where the old one was, taking care to make sure that it is the right way around - the grey lever meets up with the yellow switch. You also need to make sure that the spring is tight enough. There is very little tolerance in this. If you give the drum one extra turn, you will probably be all right but if you over turn it, your cable will not extend fully. If you put it in slack, it will not retract fully. So, to summarise, making sure that the cable goes through the hole where the yellow guide will go and there is the right tension on the cable, put it in place so that the grey lever meets up with the yellow switch. (Keep telling yourself that people do this in the factory so you can.)
Next, fit the yellow cable guide in place. |
After that, plug the two wires (the blue and brown ones) back in and push the cables back into the comb that you can see in the bottom right of the picture.
Now, you can put the bottom cover back on the machine and screw in the central screw - leaving it a little loose for now. |
| Next, put in the other four screws - again, not tightening them up. Once all five screws are in place, tighten them up - this allows the body to align itself without putting strain on any screw that might have been a bit out of place if you had tightened them up fully when putting them in in the first place. |
| Next, put the top back on by aligning the ends of the hinge and then just pushing. After that, put the wheels back on - just align them and push hard - and then push the hose bracket back into place. Finally, push the end of the hose back into the socket next to the top of the cyclone unit, put the cyclone back in place and you are ready to go. |
|
| Copyright (c)2007 Paul Grosse. All Rights Reserved |
 Dyson DC05 Cable Replacement can represent a problem because you cannot obtain any literature from Dyson about how to do it - this is for 'trained engineers only'. Whilst we all like to make money, this is not a job that is so difficult that only trained personnel can do it.