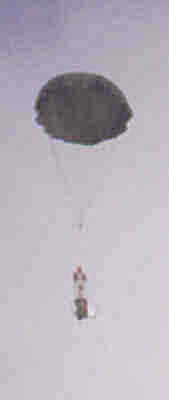
To familiarise yourself with the principles and problems of using parachutes, make this parachute which does not require any special sewing skills.
For this parachute (and its drogue), you will need . . .
Shroud The shroud is very easy to make. Simply take a
bin-liner (a wheelie bin-liner - 250 litre -
is good for this. You want a reasonably thin and
flexible sheet so don't use garden refuse bags)
and slit it across the bottom and down one side
thus making a Pick it up from a point that is halfway
between the sides that are closest together and
the same distance from one of the other two sides
(where the green lines cross on the diagram).
By doing this, you will get the Next, make a really good job of gathering the sheet in, pulling it down along its length until, you have in one hand the centre (green) and the in the other (at a distance between your hands, equal to the radius of the required shroud), the outer rim (purple). Then, using a bread knife or other sharp, long bladed knife, cut through the gathered end at the desired position and then again an inch or so from the green end - this latter cut will make a hole in the parachute that will increase its stability in decent. When you lay the shroud out flat on the floor, you should have a circle around 3 to 4 feet in diameter with a 2" hole in the middle. Now, from the remains of the original sheet, you can repeat the process, making a drogue of around 1.5 feet in diameter with a 2" hole in the middle. Cords
Take one of the eight pieces and fold in two, forming a loop. Thread the loop through one of the plastic rings and then pass the two loose tails through this loop. Pull tight, tie a knot (not to stop it from coming undone but just to provide a bit of resistance) and repeat for the other seven lengths. You should now have sixteen ends coming from one plastic ring. Then tie the elastic to the ring (as in the photograph) - tying a knot in each end so as to stop fraying. Now, tie a knot in the end of each of the cords - this will stop the cord from slipping from the shroud. Now, make a smaller one with six or eight cords around one foot long for the drogue. Assembly
Then, place the knotted end near to the edge of the shroud (half an inch) so that the cord goes away from the centre as it would during the decent. Then put a piece of gaffer tape on (about a 1" length) and press down firmly. Repeat for the other fifteen. Now you have your main chute. Repeat, using the same techniques for the drogue. Test the chutes by carefully pulling them along. You should see that they produce a fairly good hemispherical shape and a lot of drag.
|
||
 Materials and
equipment
Materials and
equipment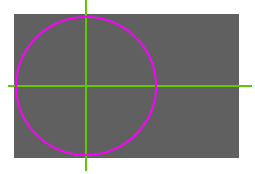 flat sheet
and lay it flat on the floor.
flat sheet
and lay it flat on the floor. largest area (outlined
in purple) and have the most spare to make a
drogue chute.
largest area (outlined
in purple) and have the most spare to make a
drogue chute.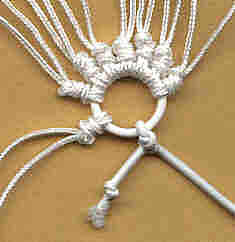 Take the nylon cord and cut off
roughly 2½ metres - placing this to one side. To
the remainder, fold it in half, then in half
again and so on until you have 8 lengths, just
over 2 metres long.
Take the nylon cord and cut off
roughly 2½ metres - placing this to one side. To
the remainder, fold it in half, then in half
again and so on until you have 8 lengths, just
over 2 metres long. 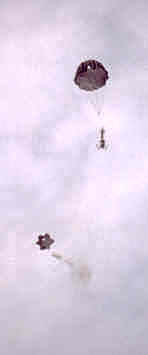 Place the plastic
ring in the middle of the shroud and lay out the
cords so that they intersect the edge of the shroud
at equal distances. Make sure that the cords are in
the order that they are on the plastic ring as this
will make it easier to sort out any tangles that you
may get into later on in the field. It is easiest to
do this by laying them out and then taking opposite
cords and laying them out at opposite sides. Then
count four cords and place that one half way.
Place the plastic
ring in the middle of the shroud and lay out the
cords so that they intersect the edge of the shroud
at equal distances. Make sure that the cords are in
the order that they are on the plastic ring as this
will make it easier to sort out any tangles that you
may get into later on in the field. It is easiest to
do this by laying them out and then taking opposite
cords and laying them out at opposite sides. Then
count four cords and place that one half way. 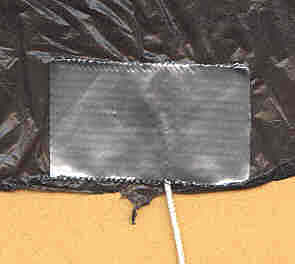 Then divide in two again and so on until
you have all sixteen cords laid out equally.
Then divide in two again and so on until
you have all sixteen cords laid out equally.