 |
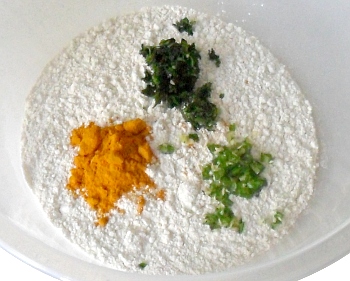
Flour, salt, turmeric, coriander and chilli.
|
Start off by making around 200mls of yeast suspension by following the recipe in the link and set it to one side in a warm place.
Weigh the flour into a medium-sized bowl and add the salt.
For the spicy version:
If you are making the spicy version, also add the turmeric, coriander and chilli.
Mix well.
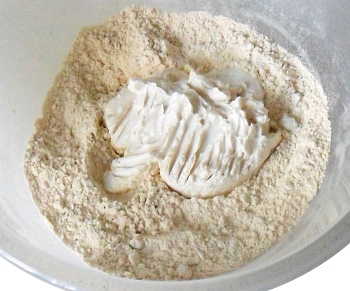 |
Add the vegan cream substitute
|
Next, weigh in the vegan cream - If you can't source any, then just miss it out. The end effect is that the cream makes the bhatooras softer but they turn out all right without using the cream.
Mix it in so that you end up with medium-sized crumbs - don't bother to disperse the vegan cream too much because it will be mixed in well, later on.
For the spicy version:
If you are making the spicy version, add the lemon juice now.
Next, add the yeast suspension and knead it into a dough.
If you haven't used the vegan cream, you will need to add a little more yeast suspension - add it, a little at a time until the dough has the right consistency.
Remember that if you find that you have added too much liquid, you can correct this at the kneading stage by kneading in more flour.
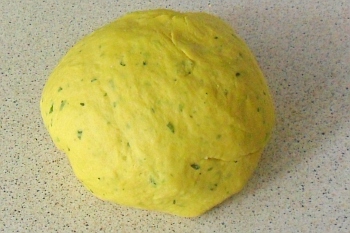 |
Knead it and roll it up. It should be like
normal bread dough at this stage. |
Knead the dough, adding any flour you need in order to make the consistensy like that of normal brad dough.
One problem with dough is that it rises so if you start tearing off chunks of dough to make dough-balls as you use them, you are going to end up with lighter dough-balls at the end because the dough increases in volume.
It is better to divide the dough up evenly before much of the rising process has taken place and then, when you are processing the dough-balls in the final stage, you know that they will all turn out roughly the same size.
Whilst you still have the dough in one piece, you might find that it has become fairly cold - it needs to be warm (around body temperature) for the yeast to work properly.
You can either let it warm up slowly in the warm place you used to make the yeast suspension, or you can speed up the process with a microwave oven.
To use the microwave oven, flatten the dough out so that it is no more than around 3cm thick and then heat it, for no more than five seconds, in the microwave oven. Once the five seconds is up, take it out and fod it over a few times. Repeat the heating, folding process until the dough is warm to the touch - remember, you are not cooking it, you are warming it up.
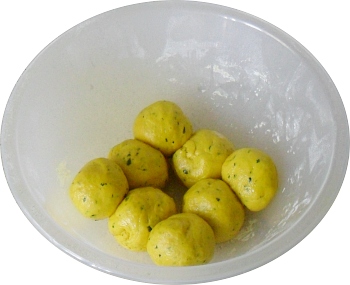 |
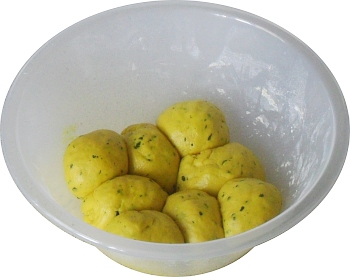
Oiled dough-balls - put them away
to rise for a short time. |
Roll out the dough into a cylinder shape and then divide it up, using a knife, into eight pieces, by cutting it in half, then them in half and again, each one in half.
That way, you end up with them reasonably even.
Next, rub some oil onto your hands and take each dough-ball, one at a time and cover the surface with a light covering of the oil.
This will stop them from sticking to each other in the next part of the process.
As you finish each one, put them in the mixing bowl.
Once you have finished, place a clean, dry tea towel over the bowl and put it in a warm place.
Leave it for around 20 minutes, depending upon the temperature.
Switch on the deep oil fryer and set it to 190C.
 |
And this is what they look like
when they have risen. |
You can see from the picture that they have risen to around twice their volume (as opposed to twice their diameter).
This is just about right because much more and you will just be knocking the gas out of it in the next step.
Take one of the dough-balls and put a little oil on it - you can do this by dipping it for a fraction of a second in the oil in the deep fryer - remember you are collecting oil, not cooking it.
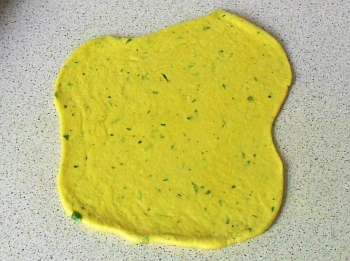 |
Round, rectangular - it doesn't matter.
Paper-bag shaped is best. |
Make sure the rolling pin and the work surface are lightly oiled and put the dough-ball on it.
Normally, you would take the time and make the effort to make them round but here, we are tryig to make things that you can take to work and, in my case, the deep oil fryer is really designed to take potato that is cut long and thin, not dough that is 15cm in diameter.
So, you can make them any shape you like although try to avoid re-entrant shapes (those with a concave side) because they don't rise very well. Rectangles, ellipses, small round bhatooras all fit in well with a lunch-box environment.
Roll it flat, a bit at a time, turning it, until it is around 4-6mm thick.
This is thicker than if you were making puri or luchi but here, we are trying to make a flatbread with some internal fluffy structure - this is why we are not using a puri press.
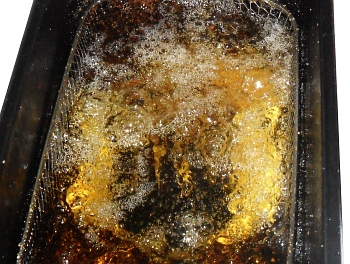 |
It sinks to the bottom and then
hold it under until it puffs up. |
Lower the rolled-out dough, horizontally into the hot oil, taking care not to allow it to fold over on itself, so that it floats down to the bottom of the wire basket.
In a few seconds, it starts to float up and the upper surface will rise out of the oil and stop cooking.
To prevent this, hold it under with a spatula.
As it cooks, the water inside the dough starts to turn to steam and the whole thing blows up like a breathalyser bag, producing quite a lot of buoyancy.
Rather than continue to force the dough under - the force you would use is dangerous with oil this hot, if it slipped - let it rise up to the surface and continue to cook there.
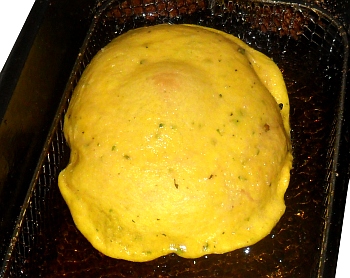 |
Still giving off steam, cook it on both sides.
|
Turn the bhatoora over so that both sides cook.
The outside should end up crispy and the interior should be fluffy and bread-like.
Like this, they are rather bulky and we wouldn't get many in our lunch box. Also, we are cooking them because they are filling.
As a result, it doesn't really matter if they keep this shape or if they are allowed to become flat again - in the same way that commercial pitta breads are sold flat.
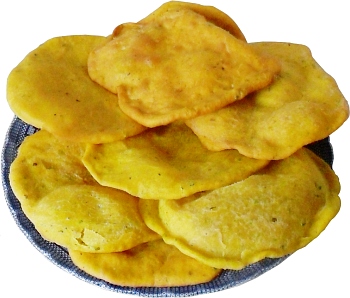 |
This recipe makes eight bhatooras -
you can count only seven. Very nice. |
So, let them cool down and once they are cold, put them in paper bags - you can obtain them from supermarkets, usually next to the plastic freezer bags and other lunch bags.
At work, put them in the microwave to heat up, then tear bits off them and use them like a small, edible scoop to pick up your chole masala.
You can see in the photograph below the chilli pieces and coriander in the spicy version.
There are no problems storing these because they are simply too nice to leave.
I have made these fresh for each day as well as making them a couple of days or so in advance - for three meals which gives results that are acceptable - expecting a similar shelf-life to commercial breads.
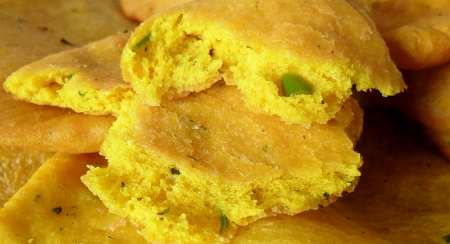 |
Lovely soft savoury bread in a crispy shell.
|