Torai Paratha
तोरी पराठा
ਤੋਰੀ ਪਰੌਂਠਾ
Paratha, simple and filled, made with Torai.
This recipe not only covers making a meal with Torai, it also shows you how to make three types of paratha. Having made the filling, it goes through each method, step-by-step.
If you already have your own filling, you can go straight to the paratha type you want on this page
Simple paratha - One piece stuffed paratha - Two piece stuffed paratha.
or see the page on different types of paratha (with links to a recipe of each type)
Paratha types page.
Ingredients:
Filling:
Paratha:
That finishing touch:
Method:
Filling:
Top and tail the chillies and cut into pieces around 5mm long.
Peel the onions and chop them finely. Skin and then grate the ginger.
a | 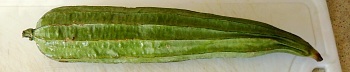 |
b |  |
c |  |
d | 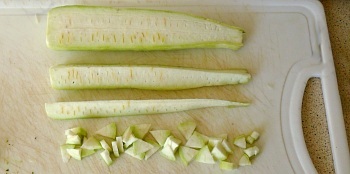 |
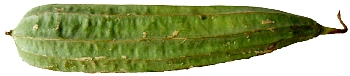
| | Torai preparation - Top, tail, skin,
slice into eighths and cut up small. |
Top and tail the torai and then skin it with a potato peeler.
Next, cut it into eight, lengthways (in half, then again then again), and then cut these into pieces only 2-4mm thick.
Don't bother trying to grate it instead as the vegetable is very springy - it is like a piece of foam rubber (it is actually the immature and edible stage of the vegetable that, if allowed to grow on to maturity, is used to make a loofah).
One thing you will notice is that is has large, soft seeds. Make sure that you use these as well because they will acquire a nice flavour, later on in the cooking process if you are making the simple paratha.
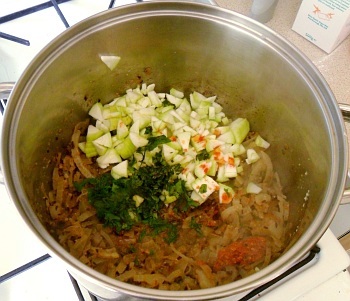 | Onions, chillies, spices, all cooked,
with the torai on top, ready to steam. |
In a pan, put the olive oil and fry the jeera. Add the asafoetida and coriander powder and fry until the coriander is cooked.
Add the chopped onions, garlic, ginger, chillies and fry until the onion is soft.
Add the coriander leaf, torai and Mr Naga chilli to taste, along with aroudn50mls of water, put on the lid and bring to the boil and then let it cool down.
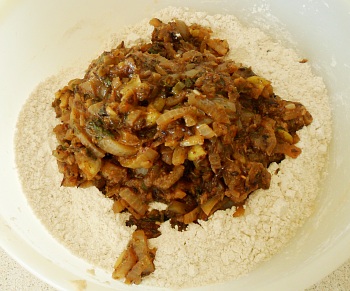 | Place the cooled filling
ingredients onto the flour. |
In a bowl, add the flour and the cooled down ingredients.
Add the lemon juice and mix it all thoroughly.
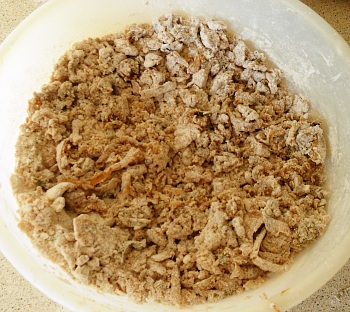 | Mix it all together to make sure
that it is all well-distributed. |
Then, add enough water to make a stiff dough (around 200mls).
Mix and then tip out and kneed.
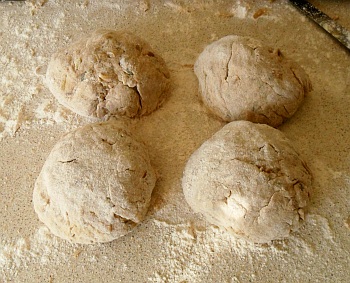 | Divide up equally to make balls
before you start rolling them out. |
Divide the dough up so that you have balls of dough mixture roughly 6cm in diameter.
The reason for such large balls - compared to the roti recipe - is that you have a lot of filling and you need enough dough to hold the mixture together when you are cooking it.
Roll them up into balls before you start on them with the rolling pin - in this way, you can ensure that they will be roughly the same size.
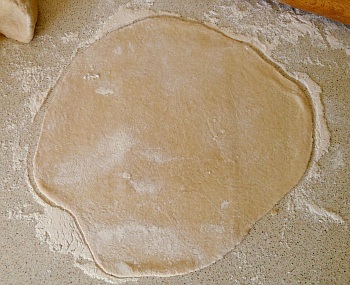
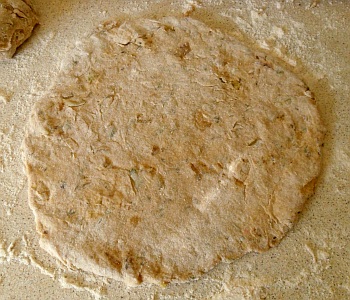 | Roll out to an even
5mm or so thick. |
Heat up the tava and put some oil on it - enough for frying. The tava should be just short of the temperature needed to make the oil smoke.
Whilst the tava is heating up, roll out a doughball into a rough circle so that it ends up around 5mm thick.
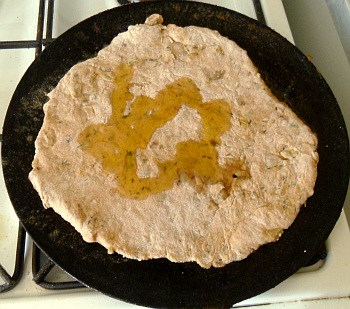 | Fry the underside and sprinkle a
little oil on top, ready to turn over. |
When the tava is at the right temperature, put the paratha on it and using your hand, press it onto the surface, correcting the shape so that it is more circular - this also makes sure that more of the underside of the paratha is in contact with the tava.
Whilst the underside is cooking, sprinkle some oil onto the top of it, ready for when you turn it over.
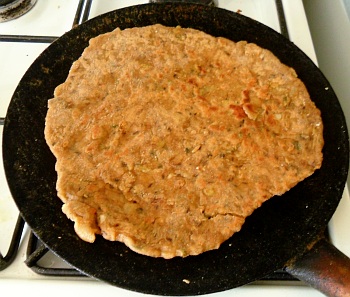 | Cook the other side but remember you
can turn if over again if you need to. |
Turn over the paratha when the underside is ready - note that you can turn this over as many times as you like, it is not like the roti in this respect.
When both sides are done, put it on the plate or cooling rack to cool down.
A nice way to finish this off is to spread your favourite pickle on half of the top and then fold it over so that you end up with a sandwich.
The disadvantage of this paratha is that if you have an ingredient in the filling that flours easily - such as potato - then it will disintegrate and mix in with the chakki atta, altering its binding and frying properties.
 | Finished. Now spread some pickle
on half of it and fold it in two. |
 | Roll out the top, bottom, left and right
edges so that they are half as thick. |
Make a fairly stiff dough from the flour and water - adding the lemon juice to the filling instead.
Roll it into a ball, put it in the bowl and cover it. Leave it to rest for 10-15 minutes.
Nead it and divide it up into balls about 5cm diameter.
Take one of the balls and on a floury surface, roll it out to roughly 8-10" in diameter.
If you look carefully at the photograph, you should be able to make out that the left, right, top and bottom of the dough has been rolled thinner, leaving the middle half at the normal thickness. This is so that when you fold them over, you don't end up with so much dough on the folded-over side.
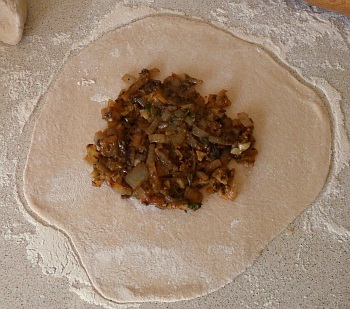 | Put the filling only on the middle half
- where you have left the dough thicker. |
Put some of the filling on the middle half of the dough that you have rolled out.
Try to make it fairly evenly distributed,
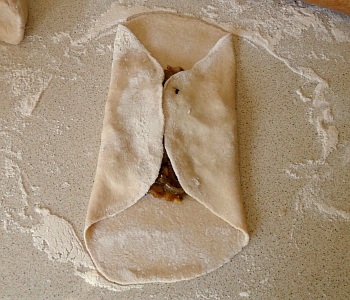 | Fold in two of the sides - you can
see why this was made thinner now. |
Wet the dough where you haven't put the filling - on the thinner parts.
Fold over opposite sides so that they meet in the middle.
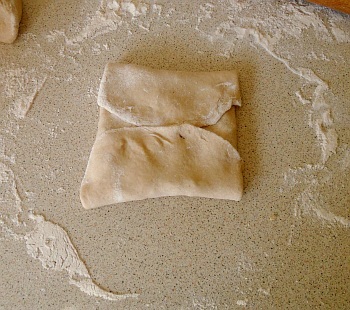 | Fold in the other two edges
to make a nice little parcel. |
Wet the new surfaces and fold in the other flaps.
Now you can see why you need to make sure that they filling goes all fo the way to the corners.
You can flatten the paratha using your hands to make it as big as you like, pushing downwards a bit at a time, but don't use a rolling pin because that will just push the filling to one end of the paratha and make it burst through the surface.
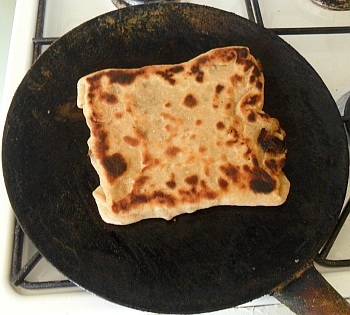 | Fry it in oil on the tava,
turning it when you need to. |
Make sure that the tava is nice and hot and has enough oil on it and gently place the paratha on it.
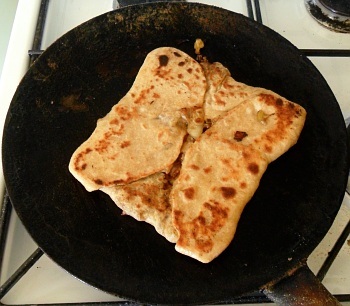 | Turn it over when it is done enough. Remember that
the dough will be a bit thicker on the folded side. |
Turn it over when you think it needs it.
It doesn't matter how many times you turn it, unlike the roti.
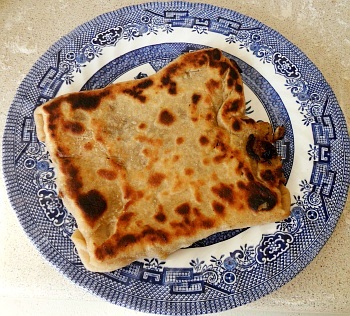 | One nice, stuffed
paratha, ready to eat. |
The finished item - ready to eat.
Note that these are a lot stiffer than the simple paratha above and don't fold over as well.
The filling is nice and hot and because they are nice and crisp, they are best eaten fresh, whilst they are still warm.
 | Stuffed, one-piece paratha,
hot and ready to eat. |
Here, we are going to sandwich our filling between what are effectively two roti.
There are essentially two ways of doing this:
- One is to roll out the dough to two thick circles that are around 6" in diameter, fill it to around an inch from the edge, wet the edge, put the other roti on top, sealing it and then flatten it with your hands as described above; and,
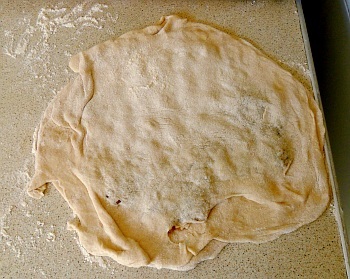
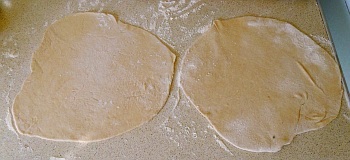 | Roll out two roti, making sure that they
are roughly the same shape and size. |
The other is to roll out the dough full size, put in the filling and put the other roti on top, joining it around the edges.
The first method is by far the easiest so we'll see the second one here.
Roll out two roti, making sure that they are the same size and, if not round, are around the same shape.
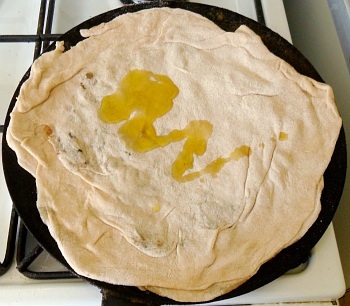
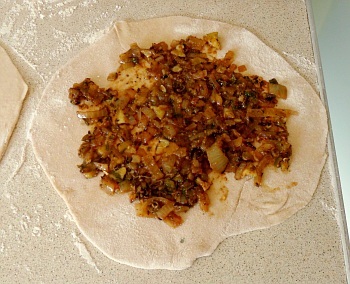 | Put the filling on it and wet the edge.
1 |
Wet one of them around the edge with water so that it is sticky.
Put the filling on it, leaving around an inch all around the edge.
 | Put the other layer on top so that it fits and
make sure that it seals around the edge. |
Carefully put the other roti on the top, positioning it so that it matches up.
This is where the smaller (first) method that you press out to the final size after joining has the edge over this method in that the thicker roti is stronger and you can align it better - making it bigger afterwards by pressing and spreading it out to the right size with your hands.
 | Put in on the hot, oiled tava and fry one side.
1 |
Carefully put the paratha on a hot, oiled tava and fry it.
Whilst the underside is cooking, sprinkle a little oil on the top, ready for when you turn it over.
Wait for it to start to bubble up a bit although you should also check to see that it isn't burning, just in case.
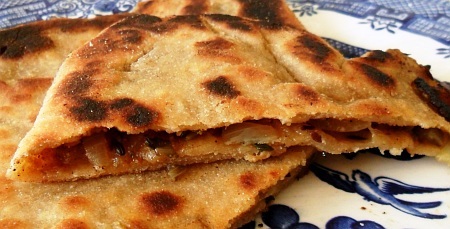
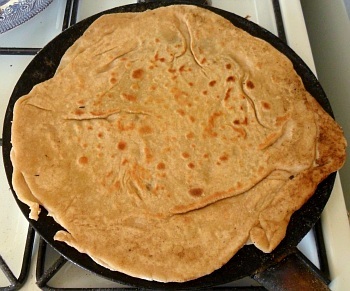 | Frying the other side should make it
inflate as it cooks in its own steam. |
Turn it over when you think it is ready for it - you can turn it again if you want.
Cook this side and it should inflate like a large bag whilst it steams the inside.
Note that if you have a leak, it won't so don't rely upon this to tell you that it is done because you will end up burning them.
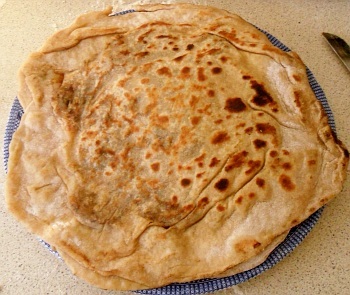 | Once they have finished cooking, let them
cool down before putting in your lunch box. |
When they are ready, let them cool down before you put them in your lunch box.
Putting them on a plate like this will do but instead, you can get crispier results by letting them cool on a cooling rack.
These are, like the simple paratha above, thin and flexiple enough to spread pickle on half and fold over.
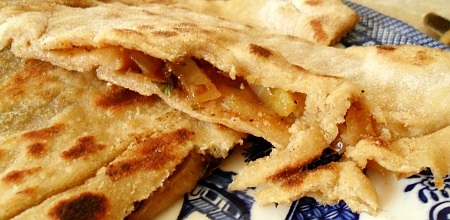 | Two-piece stuffer paratha,
hot and crispy, ready to eat. |
Copyright
©2005 - 2021
P.A.Grosse. All Rights Reserved
|