Ageing Papyrus
Making papyrus look that little bit older.
What are we trying to do?
For the sake of art, we are trying to make newly painted modern papyrus look as though it was made literally thousands of years ago so we are using actual papyrus, genuine pigments and medium and using the same techniques for applying the paint to the surface. Anybody that has done art for a while will know that single pigment paints are far superior to mixtures and that the best single pigments paints are using the original pigments. Having done that, we are going to age it using heat so that it looks superficially as though it is actually old and then, if the situation warrants it, make the edges look old and not as though they have been cut by modern scissors or a guillotine.
This isn't for the purpose of trying to sell it as though it actually was originally made thousands of years ago but just to make something look as though it was. Indeed, there are plenty of ways that pieces of genuinely aged dynastic Egyptian papyrus differ from modern 'aged' papyrus - things that we can do nothing about and that can be detected fairly easily or, if more effort has been put into making a piece that has been passed off as original, can still be detected using more advanced analytical methods.
Here are some differences:
Non-Destructive Testing
- Modern papyrus fluoresces in ultraviolet light whereas dynastic papyrus does not. The fluorescent properties of papyrus seems to be something that is lost with time. You could do something that inhibited the fluorecsence of modern papyrus but that would show up in other analysis such as UV or near IR photography. Additionally, some pigments fluoresce such as lead containing pigments and calcium containing pigments and rose madder. Red lead fluoresces an orange, white lead fluoresces a sort of grey as do gypsum and chalk;
- Gypsum and chalk are also phosphorescent - they continue to emit light for half a second or so after the UV source has been removed - not a visible light source though, it is not just bright light, it has to have enough energy and that takes UV to do it. You would have to be careful not to have anything that interfered with those otherwise that would show up. As though that was not enough, rose madder also phosphoresces but it is likely that it is the alum that it is precipitated onto that actually does this;
- Only the correct pigments would produce the correct Ramen spectroscopic results because Ramen spectroscopy looks at the atoms in the pigments and if they are not right, the spectrum will be wrong. Using a modern, safe, vermilion substitute might look similar but unless you have mercury and sulphur in there, joined together in the right way and with the other impurities in there as well, it isn't going to look like cinnabar;
- In order to satisfy the piece's artistic requirements by using genuine pigments, media and papyrus, once the piece is finished, it has a pleasant sweet antiseptic sort of smell. Smells in the case of something that is solid, are caused either by dust that is being inhaled or more likely from volatiles coming from the papyrus or the paint. Leaving it a few thousand years would cure this;
Destructive Testing
- Modern papyrus has a lower ash content than old papyrus - quite substantially lower. You are looking at the modern papyrus having an ash content of around 2% and the dynastic papyrus having an ash content of 7-15% 1. You could make papyrus with extra salt content so that the ash content would increase but it would be very easy for the cation amounts and ratios to be measured in dynastic papyrus and compared - not impossible but you would have to get it right;
- Microscopic analysis of sections of pigment will show particle size and shape with hand-ground pigments looking totally different to synthetic ones. Real lapis lazuli has large particles and bits of rock in there whereas French Ultramarine is very fine and pure and was invented thousands of years after dynastic Egyptians died out;
- Dynastic Egyptian papyrus was made in an environment that was: Pre-Chernoble, Pre-Atom Bomb and so on. The atoms that contaminate modern papyrus, in the same way that they contaminate every living thing nowadays, are detectable in extremely low levels - in the order of atoms - and their precise energy values identify them specifically and can even identify where they came from;
- The carbon date of dynastic papyrus places it at thousands of years old, not months and you cannot do anything about that so even if you managed to work your way around all of the other points, the only way of working your way around this is to use original papyrus; and,
- Finally, the other product of a living thing that was contemporaneous with the papyrus is the acacia gum (an honey if appropriate) of the paint medium. You would have to find gum Arabic resin that was thousands of years old to get that right.
So, it is not reasonably practicable to make a 'fake' papyrus that passes all of the analysis that we can throw at it such as: Carbon Dating; UV/VIS spectroscopy; IR spectroscopy (including FTIR); Near-IR photography (including IRFC); UV photography (including UVFC); radioactive analysis and so on. In fact, using a UV torch - the sort of thing that a door supervisor might have for checking bank notes or driving licenses - you can find out if a piece of papyrus fluoresces. However, it is possible to make one that looks real using just our own senses (so, that is looking at it in a variety of lighting situations excluding UV and essentially, not smelling it).
What is Papyrus?
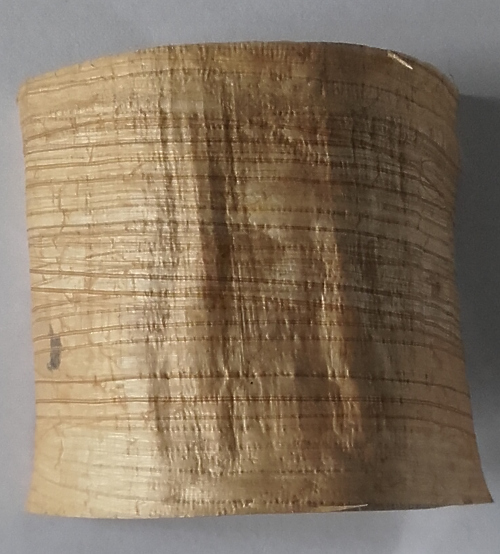
This is a sheet of papyrus typical of the sort of stuff that you can buy over the internet today. It is roughly the size of a sheet of A4 paper and is made in Egypt by taking the stems of the papyrus plant, slicing them thinly, laying them down side by side on a flat surface, putting a similar layer across them so the two layers are at 90 degrees to each other then hitting them with a mallet then letting them dry out in the sun.
You can see that being a natural product, it varies considerably. Some sheets are thicker than others, some have holes in where there are gaps in both layers that coincide, the colour changes from sheet to sheet and also within a sheet and so on.
Here you can see a sheet of papyrus illuminated from the back, showing the way that the reed slices are laid out.
They are not woven together, they are simply laid down one layer going one way and then on top, the other layer going at right angles to it.
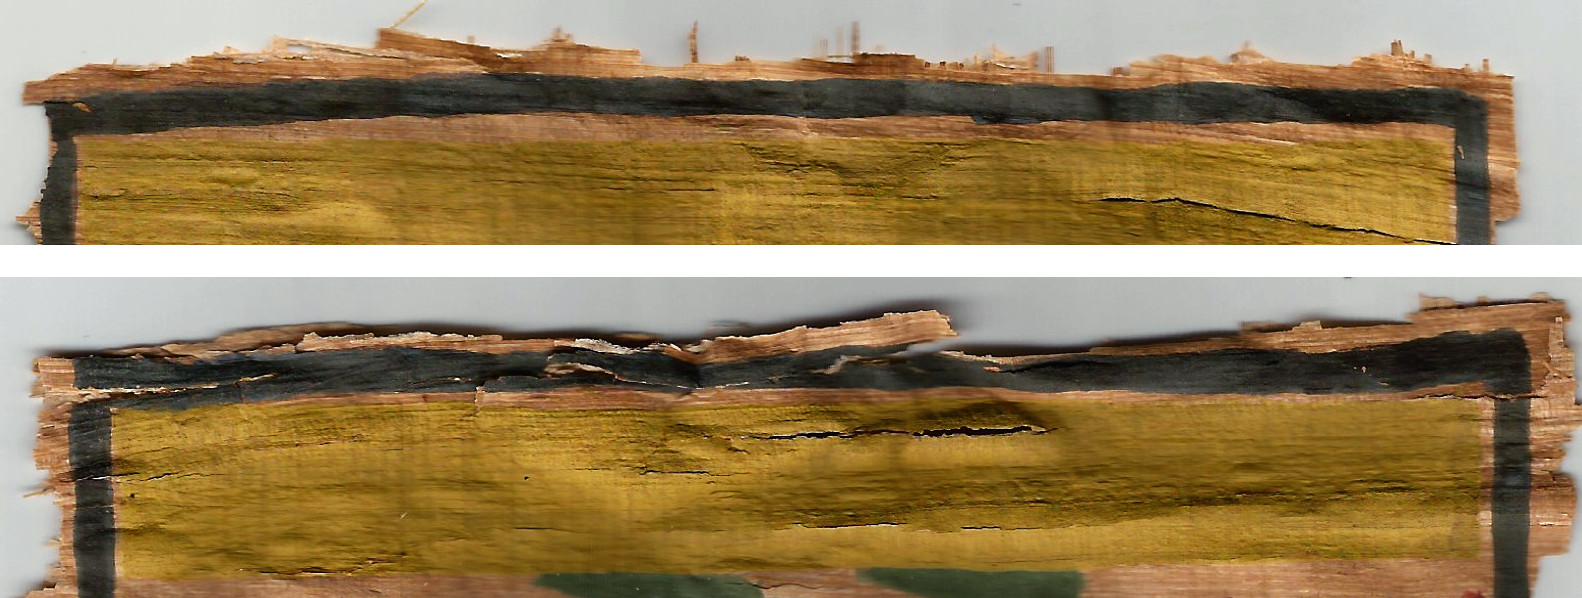
These two images are closeups from the sheet at the top of this page, scanned at 300dpi. You can see how the vascular bundles of the plant stems run parallel to each other, leaving darker and lighter stripes.
There are curved lines, splits, irregularities in thickness, bits of darker matter in there, odd strands of plant material that have become part of the paper and all sorts of things.
You can see on the lower of the two closeup images, the vertical lines from the other side showing through
In short, it is an interesting material to work with.
So, why do we want to age it and what do we also need to know?
Papyrus was used by the ancient Egyptians for thousands of years before the beginning of the common era and for hundreds of years afterwards. It was easy enough to produce for everyday things to be written on it and yet durable and fine enough for it to be used to record important things on it.
In Egypt, the conditions were just right to allow it to last to the present day so we have some very large collections of ancient Egyptian papyri around the world. Modern papyrus, whilst it is largely the same thing, looks young so if we are to make apiece of art that looks to the normal eye as though it has been around for a few thousand years, we need to treat it in some way, along with everything else that has supposedly made the same journey through time.
This isn't about making forgeries of ancient documents - science is far too advanced for them to stay forgeries for long - it is about making something have the character of an old document, whether it is writing or pictures.
So, apart from ageing the papyrus, we also need to age the other components, ie pigments and medium.
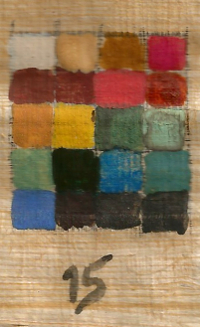
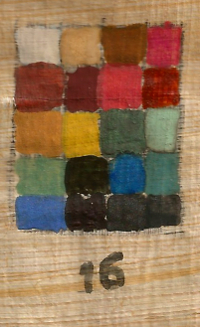
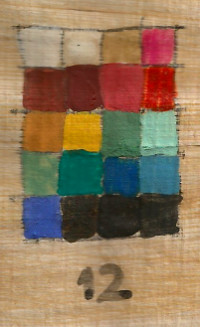
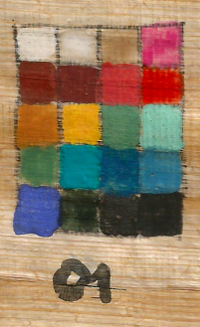
Here is a sheet of papyrus with 16 test pieces on it, ready to be aged an a number of experiments with number one obviously being the standard that is just left so that we can compare things with as we go.
What exactly can we do to papyrus to make it look old that we can do reasonably safely?
We need to look at what has happened to the real thing over the years and as we are thinking about speeding up the process, waiting for 3,000 years or so isn't an option.
In the desert, the real thing has been exposed to heat and cold in the presence of various amounts of water vapour for thousands of years. It is a fairly safe assumption - certainly for the purposes of looking at what we can reproduce safely ourselves - that the atmosphere that they have been exposed to has just been air with no special elevations or reductions of gasses over the time although you could say that:
- some of the pigments will give off hydrogen sulphide,
- the papyrus might give off either carbon dioxide or methane
- some atmospheric oxygen might be used up.
Old pigments that contain sulphur in a non-oxidised form include:
- Cinnabar - Mercury sulphide (also the artificial pigment vermilion) Quite stable and in practice, has been mixed with sulphide sensitive pigments with no reaction;
- Orpiment - Arsenic Sulphide. Readily gives off H2S.
- Lapis lazuli - Sulphur is as S3-. It tends to be stable but if you get the finely ground pigment or its artificial equivalent, French Ultramarine, it does smell a little bit 'sulphidey'. Usually okay. More susceptible itself to acid fading rather than attacking other pigments.
Note that sulphur can also come from the air - sulphur containing fuel in candles, fires and so on.
Pigment elements that are sensitive to hydrogen sulphide include:
- Lead
- Lead White - the sulphide displaces the carbonate and hydroxide and it goes black.
- Red Lead - Minium - usually quite stable.
- Litharge - Lead Oxide.
- Lead Antimoniate - Naples Yellow - from Egyptian art but found in pottery glazes.
- Lead Tin Yellow I and II - far later than Egyptian art - more Renaissance (15th Century northern Europe)
- Copper
- Malachite - Copper II carbonate Hydroxide - goes black.
- Azurite - Copper I carbonate Hydroxide - goes black.
- Verdigris - Copper II Acetate - very reactive. Goes black unless protected by a layer of medium or is in excess medium. If the medium includes a reducing agent such as fructose - a reducing sugar - it will instead turn to finely divided copper metal which is a pinky brown colour - make you verdigris water colour paint using only acacia gum, no honey humectant and that is what I have done here.
- Egyptian Blue - calcium copper silicate. Seems okay.
- Silver
- Usually found in paintings just as silver leaf but it does react and it goes sepia then black.
Another thing to consider is the pigments reacting with the surface or the medium.
We already know that if you put verdigris with a reducing agent such as fructose, it will turn to brown copper metal powder. But there is a possibility that some pigments will react with other things that are around.
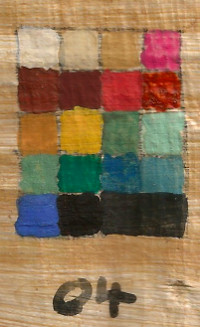
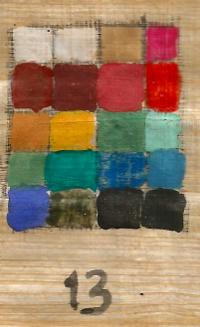
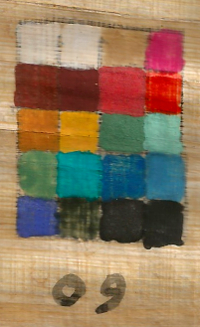
The test sheet was marked out in pencil from a master pattern using a light box. The cells on it were then painted in, one colour at a time so that each colour was pure and numbered using the carbon black paint. It was then cut up into near-identical sheets so that I could keep track of them during the experiments. Finally, it was left at room temperature in a normal domestic environment for four days to let the paints and the papyrus dry out and equilibrate with its environment.
Everything was ready so as a starting point, I heated up the fan oven to 220C, chucked in a piece and saw how long it took for the papyrus to 'age' so that I could see what had gone wrong elsewhere.
The Experiments
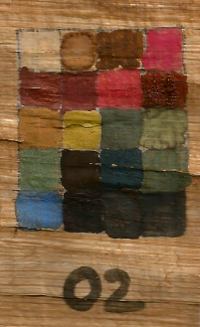
This is what happens when you 'bung it in the oven' for 5 minutes at 220C.
You can see that a number of things have happened to it:
- The papyrus has bubbled and separated where, one might presume, there as been an excess of water in it and as it has turned to steam, it has separated the front and back layers;
- The papyrus has curled with the painted side on the inside implying that it has shrunk
- The elevated temperature has lead to degradation of the colours. This has been in the form of:
- Overall yellowing that has happened to all of the colours; and,
- Some of the colours changing quite drastically.
1. This problem is solved simply by drying the papyrus out at an elevated temperature that is low enough that it won't damage the piece of work but high enough to remove the water. I had a go at 90C for 10 minutes and as you can see from $09 below, it didn't have any effect on the work other than drying it out. I further dried out some more test samples - $s 03, 04, 05 and 06 - and ran them at the same temperatures and times for the higher test samples.
2. This is just something that can happen. When I put all of the test samples on the scanner to scan them all at the same time, all of them were curled to some degree and when I put $02 on the glass, it actually cracked - only on one side but it adds to the ageing effect.
3a. The only thing in common with all of the colours is the medium so it is reasonable to assume that this effect is caused by the medium degrading in the heat which you would expect at some temperature or other - here, it seems that by the time you get to 220C for five minutes, you have found it.
3b. Some colours behave themselves quite well such as the lapis lazuli and the orpiment but others, such as the verdigris and the minium (red lead) have clearly reacted.
One of the things that has been done here is they have all been cooked for 5 minutes at their respective test temperatures. In chemistry, there is a rule of thumb that says that each ten Celcius you raise the temperature, you double the reaction rate. You can see that this is a reasonable rule of thumb in that increasing the temperature of a liquid will double the vapour pressure and whilst a factor of two is never held exactly, it is close enough for most things.
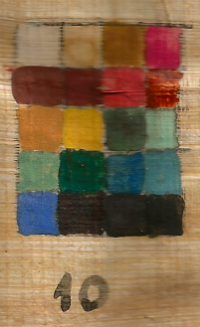
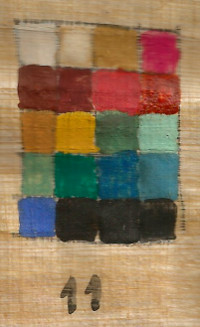
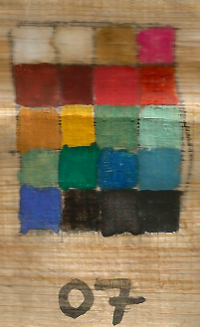
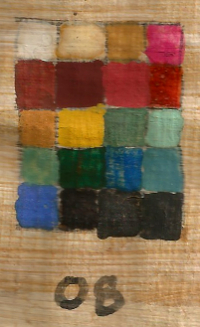
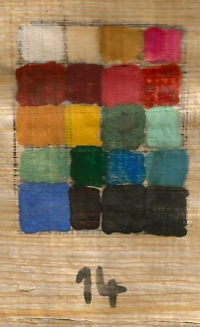
With this in mind, I have taken a temperature that for five minutes looks a little undercooked and extended it to 10, 15, 20, 30 and 45 minutes so that we can see what happens. If you look at samples 10 and 14, you can see that they look very similar. A 20 degree decrease in temperature turns 5 minutes into 20 minutes. We can use this to work out a best temperature and time.
Here are the results. In the bottom right, you can see a blow-up of the samples. The one on the left is the standard that was not exposed to elevated temperatures and if you put the mouse over one of the other samples, you can see it on the right so that you can compare it directly. In this way, you can sweep the mouse over a range of samples and see how the colours change in the blow-up.
Results Duration / m Temp
/CPre- treat
10m @90C
then
5m @xC0 5 10 15 20 30 45 220 180 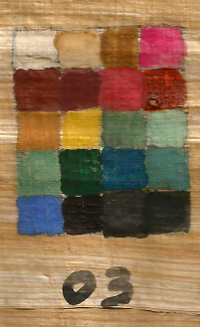
160 140 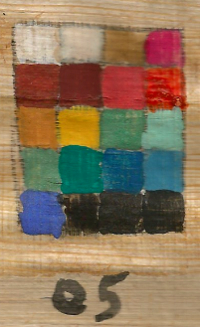
Close-up Select the right image by hovering the mouse over the one you want. 120 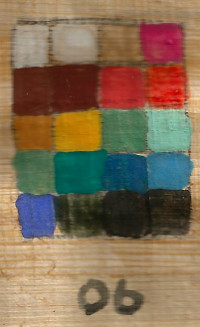
Blank Cooking for 10 minutes at 90C clearly does not alter the way that the papyrus, pigments and medium react later on and it does eliminate bubbling of the papyrus.
220C gives us the colouration that looks right for this project but whilst five minutes might be all right for a small piece of paper in a fan oven, a larger piece really needs baking for a longer time so as to reduce the chance of variation over the surface - hotspots and coldspots. So, if we bake it for 10 minutes, we can do that at 210C.
The next thing we need to consider is which pigments to use. The table below is a composite of the colours taken from these samples so that we can see which are stable enough and which to avoid. They are produced by taking the images for five minutes ($s 01, 13, 12, 11, 10 and 02), sampling the colours and getting the RGB values for the table to use. Sampling of real-life pigments that have been treated in a non-lab environment like this can produce variations so there is a little 'noise' in the results but you can still see what is what.
Colour Blk 120 140 160 180 220 Comments Aged palette
at 220CBest colour
in groupColour Lead White Best of the whites - doesn't seem to react with the medium. Lead White Chalk White Okay until it gets to 180C. x - - Gypsum Okay until it gets to 180C. x - - Rose Madder Stable all of the way through. Rose Madder Red Ochre Stable all of the way through. Red Ochre Iron Oxide Stable all of the way through. - - Cinnabar Stable all of the way through. Cinnabar Minium Starts to react at 140. x - - Yellow Ochre Stable all of the way through. Yellow Ochre Orpiment Stable all of the way through. Orpiment Malachite Coarse Okay at a pinch but has started to fade at 220C - - Malachite Fine Okay at 180C x - - Terre Verte Best of the greens. Terre Verte Verdigris The medium here is without honey but it still reduces. x - - Azurite Okay at 180 x - - Egyptian Blue Starting to fade at 180C, gone by 220C x - - Lapis Lazuli Holds really well but just starts to fade Lapis Lazuli Woad Found on papyrus but doesn't do too well x - - Magnetite Good and found on later papyri - - Lamp Black This cannot deteriorate Lamp Black Blk 120 140 160 180 220 Best colour
in groupOne interesting thing to note is that the best colours at 220C are all either sulphur containing or sulphur tollerant
So, we now have a temperature and a time to process the papyrus at, along with a palette of stable colours that look good under those conditions.
The next thing that we have to consider is the edge of the piece.
Papyri are mounted in one of two ways: the edges extend well beyond the area of interest and are hidden by a matte; or, the edges are broken and irregular and are on display. For the latter to be utilised, we need to know how to create this effect.
As breakage on old papyri seems logically to be more recent than the document, it would make sense to do this to the piece after it has been baked although the real pieces have had chance for the oxygen and moisture to diffuse through the papyrus to the inside so it might be argued that a better way would be either to break the edges first or to part-bake it, break the edges then finish the baking process..
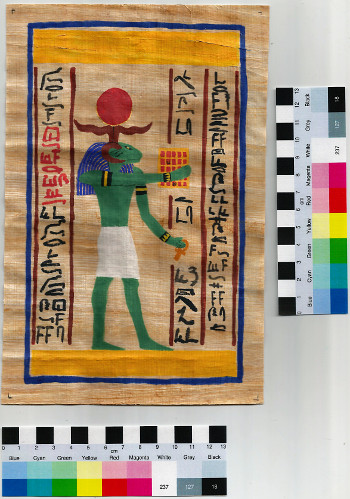
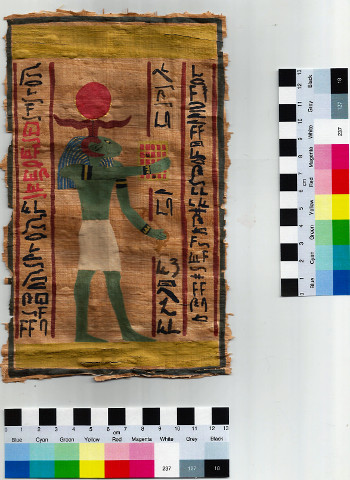
Here, you can see the before and after pictures - the cover for Hyper-Gogen Puzzles Book 2.
This was 'conditioned' for 10 minutes at 210C. After that time, apart from the colours and the papyrus 'developing', the edges become easier to break off in the traditional way that old papyrus fragments at the edges.
You can see that here in detail - the scan is done at 300dpi. Look at how the papyrus has broken along the edges and within the body of the picture.
So, what can we conclude?
Tests Passed
- We can make a piece of artwork that looks to the naked eye under normal lighting as though it was created thousands of years ago;
- We can use the original pigments and medium so that the colours react properly to the 'ageing' process and look correct afterwards - the coarser pigments will have a 'twinkle' as straight edges catch the light;
- The Raman Spectroscopy will show correct pigments and medium;
Tests Failed
- Ultra-Violet light will reveal that the papyrus is modern as it fluoresces;
- If UV-blocking is used to stop the papyrus from fluorescing, rose madder will not fluoresce (if it is there) but more likely, lead white and calcium salts will not phosphoresce if UV is blocked from them;
- Ash content of the papyrus will be low showing that it is modern;
- Carbon dating of papyrus or medium will show it is modern.
- Trace radio isotopes will show it is post Chernobyl
So...
This process passes all of the visual processes and if somebody was stupid enough to try to sell something that has been produced like this as though it was original, they could be found out using just a UV pen torch. If they had managed to circumvent that by some means, there are the other methods to have to cope with as well - Carbon 14 being the real killer on this for anybody who wanted to be fraudulent.
1. Lojewska, J. et al. Recognizing ancient papyri by a combination of spectroscopic, diffractional and chromatographic analytical tools. Sci. Rep. 7, 46236; doi: 10.1038/srep46236 (2017).Google it - Back up this page
All images and original artwork Copyright ©2019 Paul Alan Grosse.
